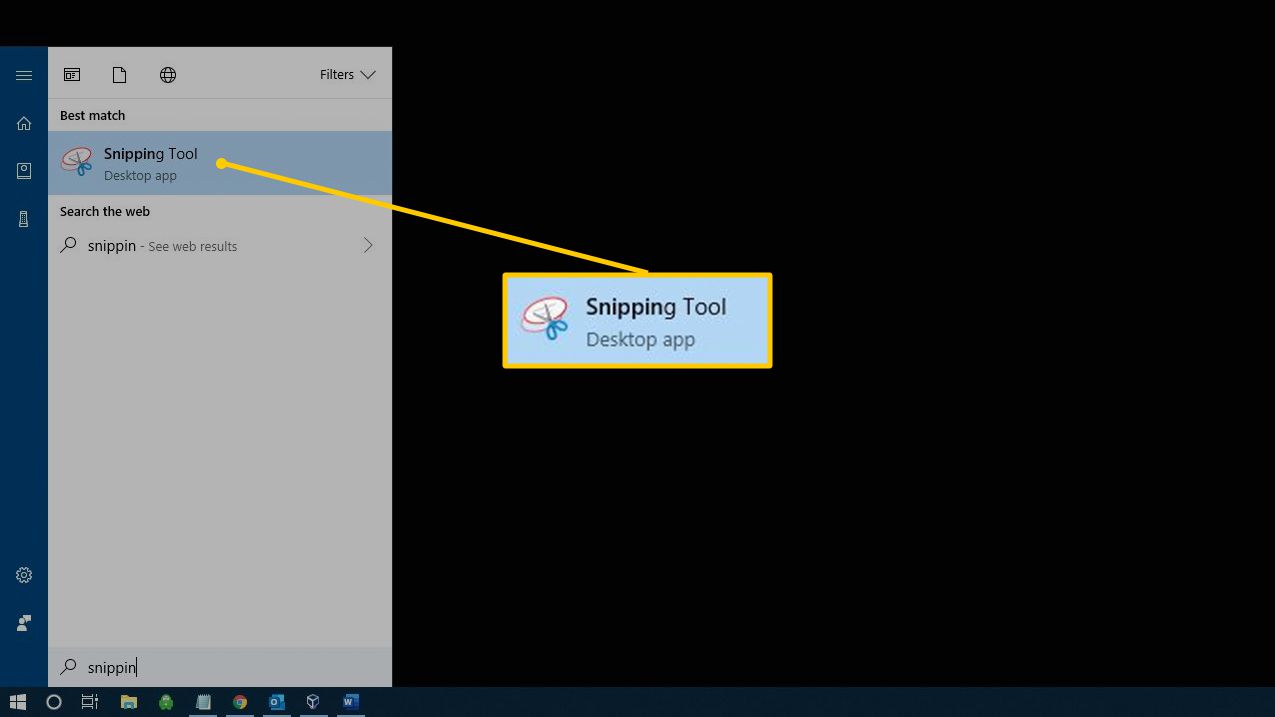
Snipping on Chromebook has become an essential skill for both casual users and power users alike. Whether you're capturing a quick screenshot or editing detailed images, knowing how to snip on Chromebook can make your workflow smoother and more efficient. But where do you even start? Fear not, because we're about to break it down for you in simple terms. So, grab your favorite beverage, and let's dive into the world of Chromebook snipping!
Let's be honest—Chromebooks are becoming increasingly popular these days. With their lightweight design, long battery life, and seamless integration with Google services, they're a go-to choice for students, professionals, and everyday users. But one thing that often trips people up is how to take screenshots or snip specific parts of the screen. If you're one of those folks scratching their heads, don't worry. We've got your back!
By the end of this guide, you'll be a pro at snipping on Chromebook. We'll cover everything from basic shortcuts to advanced tools, so you can capture exactly what you need without breaking a sweat. Let's get started, shall we?
Read also:Waitresss Brilliant Defense Against Nontippers Wins Admirers
Table of Contents:
- Introduction to Snipping on Chromebook
- Understanding the Basics of Chromebook Snipping
- Methods to Snip on Chromebook
- Built-in Tools for Snipping
- Third-Party Apps for Advanced Snipping
- Pro Tips for Better Snipping
- Common Issues and How to Fix Them
- Snipping on Chromebook vs Other Devices
- Privacy Considerations When Snipping
- Conclusion: Level Up Your Snipping Game
Introduction to Snipping on Chromebook
Why Snipping Matters
Snipping isn't just about taking random screenshots anymore. It's a powerful tool that can help you communicate better, document processes, and even showcase your work. Whether you're a student needing to capture a part of a lecture or a professional sharing important visuals with your team, knowing how to snip on Chromebook can save you tons of time.
But here's the deal—not all snipping methods are created equal. Some are quick and easy, while others offer more advanced features. That's why understanding the different ways to snip on Chromebook is crucial. Let's explore the basics first!
Understanding the Basics of Chromebook Snipping
Before we dive into the nitty-gritty, let's talk about the basics. Snipping on Chromebook can be done in several ways, depending on your needs and preferences. The most common methods include keyboard shortcuts, built-in tools, and third-party apps. Here's a quick rundown:
- Keyboard Shortcuts: Quick and easy for basic snipping.
- Built-in Tools: Perfect for more detailed snipping and editing.
- Third-Party Apps: Ideal for advanced users who need extra features.
Now that you have a basic understanding, let's move on to the methods themselves.
Methods to Snip on Chromebook
Keyboard Shortcuts
Keyboard shortcuts are your best friend when it comes to quick snipping. Here are some of the most useful shortcuts:
Read also:Walmart Introduces Defensive Tactics Amid Growing Threat Of Gift Card Scams
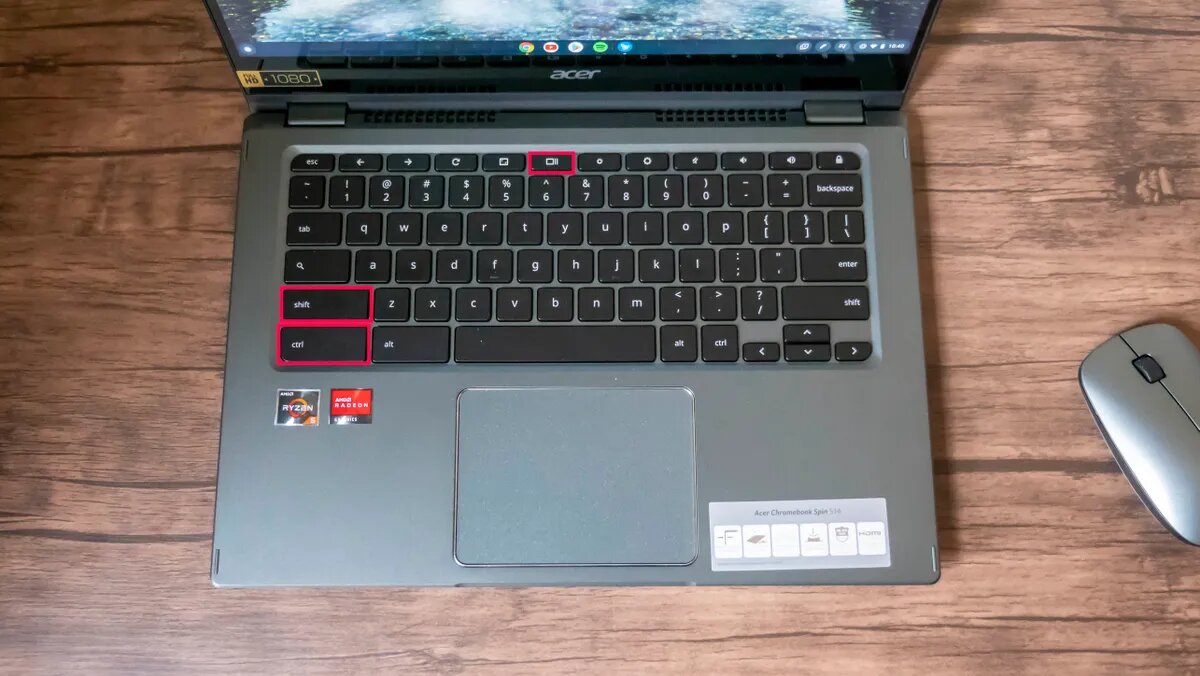
- Full Screen Screenshot: Press
Ctrl + Shift + F5. - Partial Screenshot: Press
Ctrl + F5, then click and drag to select the area you want to capture. - Window Screenshot: Press
Ctrl + Shift + F5, then click on the window you want to capture.
These shortcuts are simple yet effective. They allow you to capture exactly what you need without any hassle.
Built-in Tools for Snipping
Chromebooks come with a built-in tool called "Screen Capture" that makes snipping a breeze. Here's how you can use it:
- Press
Ctrl + Shift + F5to open the Screen Capture tool. - Select the type of capture you want: full screen, region, or window.
- Once you've captured your image, you can edit it directly within the tool.
This built-in tool is perfect for users who want a bit more control over their snipping process. Plus, it's always available, so you don't have to worry about downloading additional software.
Third-Party Apps for Advanced Snipping
When Built-in Tools Aren't Enough
For those who need more advanced features, third-party apps can be a game-changer. Some popular options include:
- Snagit: Offers advanced editing tools and annotation features.
- Greenshot: Lightweight and easy to use, perfect for quick edits.
- Lightshot: Simple and intuitive, great for sharing screenshots directly.
These apps provide additional functionality that the built-in tools might not offer, such as adding text, arrows, or shapes to your screenshots. If you're into editing, these apps are definitely worth checking out.
Pro Tips for Better Snipping
Now that you know the basics, let's talk about some pro tips to take your snipping game to the next level:
- Use Labels: Add labels to your screenshots for better clarity.
- Organize Your Files: Keep your screenshots organized in folders for easy access later.
- Experiment with Effects: Try out different effects to make your screenshots stand out.
These tips might seem small, but they can make a big difference in how effective your snipping is.
Common Issues and How to Fix Them
Even the best tools can have hiccups. Here are some common issues users face when snipping on Chromebook and how to fix them:
- Shortcut Not Working: Make sure you're using the correct combination of keys.
- Tool Not Opening: Restart your Chromebook and try again.
- Editing Issues: Ensure your app is up to date and try clearing the cache.
By addressing these issues early, you can avoid frustration and get back to snipping in no time.
Snipping on Chromebook vs Other Devices
So, how does snipping on Chromebook compare to other devices? Let's break it down:
- Windows: Offers more advanced tools but can be more complex.
- Mac: Known for its sleek design and user-friendly interface.
- Chromebook: Simple and efficient, perfect for everyday users.
While other devices might offer more features, Chromebooks strike a great balance between simplicity and functionality.
Privacy Considerations When Snipping
Privacy is a big deal, especially when it comes to sharing screenshots. Here are some things to keep in mind:
- Blur Sensitive Information: Make sure to blur out any personal data before sharing.
- Use Secure Storage: Keep your screenshots in a secure location to prevent unauthorized access.
- Be Mindful of Sharing: Only share screenshots with people you trust.
By following these privacy tips, you can ensure that your screenshots are safe and secure.
Conclusion: Level Up Your Snipping Game
And there you have it—a comprehensive guide on how to snip on Chromebook. From basic shortcuts to advanced tools, you now have all the knowledge you need to capture and edit screenshots like a pro. So, what are you waiting for? Go ahead and try out these methods, and don't forget to share your newfound skills with others.
Remember, the key to mastering snipping is practice. The more you do it, the better you'll get. And who knows? You might just discover some cool tricks along the way. So, get out there and start snipping!
Feel free to leave a comment below if you have any questions or tips of your own. And don't forget to check out our other articles for more useful information. Happy snipping!